Create a Server
Ready to start tracking analytics? Here’s how to create your first server in Hoglin.
-
Login to Hoglin
Section titled “Login to Hoglin”Log in to your Hoglin Dashboard.
- If you don’t have an account yet, create one here.
- Once logged in, you’ll land on the server creation page.
-
Fill out server details
Section titled “Fill out server details”You’ll be prompted to enter:
Server name: This is how your server will appear in your dashboard
Dashboard URL: This is the name you’ll access your server by, it’s unique per user, so choose anything!
(Only lowercase letters, numbers, and hyphens are allowed.)
-
Get your API key
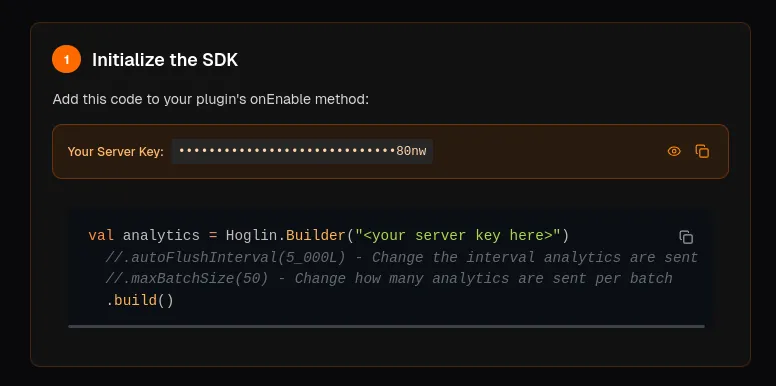
Section titled “Get your API key”Once you’ve created a server, you’ll land onto our onboarding page. This page includes your server key, and it’s required to use our software.
Copy your server key using the copy button

-
Add the SDK to Your Plugin
Section titled “Add the SDK to Your Plugin”Now you’re ready to integrate Hoglin into your Minecraft server!
Follow the Getting Started guide →
Enter your Server Key into the SDK initialization code:
(ideally you would use a custom configuration option for this)val analytics = Hoglin.Builder("<your server key>").autoFlushInterval(5_000L).maxBatchSize(50).build()Hoglin analytics = new Hoglin.Builder("<your server key>").autoFlushInterval(5_000L).maxBatchSize(50).build();Implement the
Hoglin#trackmethod anywhere you want to track events.Restart your server and watch events appear in your dashboard!
-
Invite Team Members (Optional)
Section titled “Invite Team Members (Optional)”Users on the Network plan and above can invite users to their Hoglin dashboard.
- Go to your servers Settings tab
- Click Add User within the Users section
- Enter the users username or Hoglin email
Where do I find my server key later?
Go to your server’s settings in the dashboard. Your key is always visible with a copy button.
Can I change my dashboard URL?
Yes! Edit your server settings and update the “Dashboard URL” field.
How do I delete or wipe a server?
In your server’s settings, scroll down to find options for “Wipe Analytics” or “Delete Server.”
Keep in mind, these actions are permanent.